
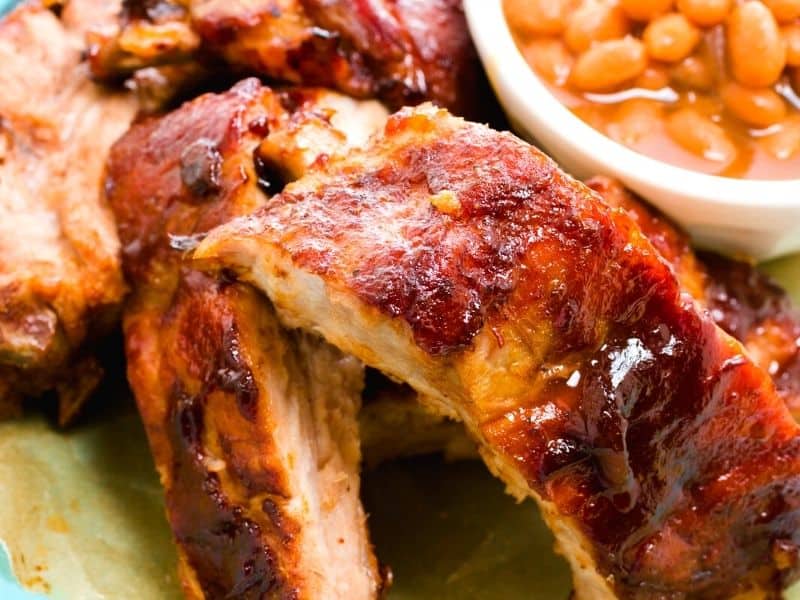
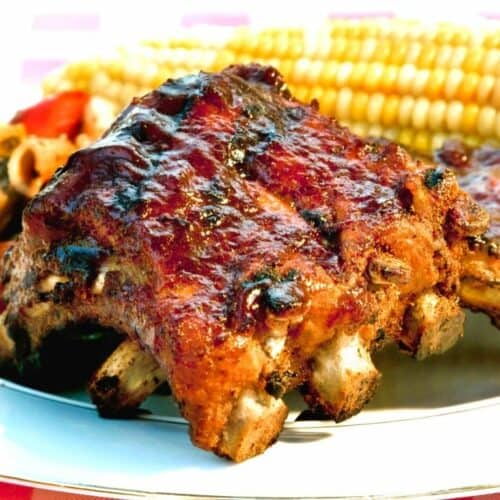
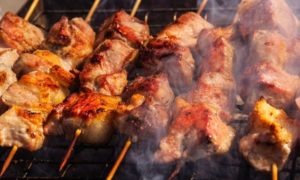
Nothing says barbecue and grilling like ribs. And nothing is quite so satisfying as flavorful, moist, fall-off-the-bone baby back ribs. But getting ribs just right at home takes some ingenuity, patience, and a little bit of know-how.
There are many methods out there for perfecting your baby backs. Honestly, the method that works best for you will likely be a combination of multiple others.
Don’t expect perfection on the first go. But if you’re careful, it’s sure to be delectable no matter how you approach the recipe.
Why Slow Cooking Ribs on a Gas Grill is the Way to Go
Cooking ribs is quite the event. They’re a big chunk of meat, full of flavor but also contain lots of fat and connective tissues.
With the wrong cooking method, they can come out tough and chewy — an epic disappointment. But when they’re good, they’re unbelievably good.
So what’s required to get them right?
The answer is time and careful preparation. This isn’t a dish where you can take shortcuts. You can’t move them to direct heat to hasten their progress. All of the connective tissues in the ribs need time to break down during the cooking process.
It’s also important to realize that while ribs are commonly associated with grilling, throwing them on the grill isn’t the simplest way to get the best results.
The beauty of cooking ribs is all of the flavors that can be captured and turned into a delicious sauce and glaze. There should never be a need for a bottle of sugary sauce when you cook your baby back ribs from scratch.
But to do this, you’ve got to fully embrace low and slow indirect cooking methods. In technical terms, the best way to cook ribs is via braising, not grilling. High-temperature direct heat is not your friend with ribs.
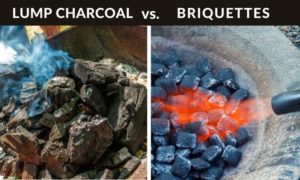
With that in mind, charcoal doesn’t make much sense.
These ribs are going to bubble away for hours. Do you want to be tinkering with keeping your coals at just the right temperature for that long?
The classic ribs recipes you’ll find online are smoked for long periods. There are a few problems with this method for your typical backyard chefs. For one thing, it’s challenging to get the juicy, fall-off-the-bone texture that most people like about baby back ribs. For another, it requires quite a sizeable dedicated smoker.
Compared to a smoker, you can get as good, or even better, results by using your standard backyard gas grill and wrapping the ribs in aluminum foil.
Gas grills let you monitor and control the heat easily, which means you can pay less attention to the cooking and enjoy yourself while the ribs reach the perfect doneness. Cooking the ribs in foil allows you to capture the delicious juices for use in your own freshly-made sauce.
Tips for Cooking Ribs on a Gas Grill
Gas Grill Setup
Not every grill is perfect for ribs. There are a few things you need to think about, and if your grill doesn’t meet the requirements, you might have to make some allowances.
Here are the most important things to consider about your grill:
- Size of the Grill: For one thing, the grill needs to be big enough. You can usually squeeze a full rack of ribs onto the grates, but remember that the priority is to keep cooking on the indirect heat. You might do best to divide the rack into halves, each wrapped separately, to keep them shorter.
- Number of Burners: The more burners your grill has, the better. More burners aren’t required just for producing more heat — they also give you better heat control. With 3 burners, you can use one end burner, or perhaps the 2 end burners, to keep the entire cooking area evenly heated at a low temperature.
- Thermometer: It’s a good idea to have a super accurate thermometer on your grill. Ideally, you’ll have something that indicates the cooking temperature and alerts you if it gets off by 20 or more degrees. Additionally, you can place a probe-style meat thermometer in the ribs to alert you when they’re ready for the next step.
- Smoker Box: Having a smoking box is a fun addition. These ribs will come out with plenty of smokey flavors regardless of how they’re cooked, but if you have an easy-to-use smoker box that puts out a lot of smoke, there’s no reason not to turn it on!
Meat
Purchasing ribs is an eye-opening experience. There are quite a few different cuts to consider, and many chefs enjoy experimenting between pork and beef.
Pork vs Beef
Pork ribs are, by far, the most popular types of ribs for barbecue. Pork tends to have more meat and less cartilage, but you can cook both types similarly.
Back Ribs
Pork back ribs are commonly called baby back ribs. This part of the rib comes from up high, where the rib cage meets the backbone. With pork, a full rack usually has between 8 and 13 ribs, each one between 3 and 6 inches wide.
With beef back ribs, these cuts are often mostly bone, fat, and cartilage. All of the best meat from these animals gets saved for the ribeye and prime rib cuts.
Spare or Short Ribs
Spare ribs come from lower down on the rib cage, from the part that goes around the belly. They have even more fat than back ribs, and they’re spaced farther apart. Each one is 6 to 8 inches wide, and they contain more tough meat and cartilage.
Beef short ribs are preferable to the back ribs since they’ll often have a lot more meat on them. They’re usually cut short, between three and four inches long. Beef short ribs are best prepared braised, either with a foil recipe or even in a slow cooker.
Country-Style Ribs
This type of rib is a bit of a misnomer. Sometimes it’s a generic term that refers to cuts of meat fashioned to look like ribs but may not come from the rib cage.
Often they are made of rib chops from the shoulder end of the loin. They’ll have a bit of rib bone and a bit of backbone. But sometimes, country-style ribs come from the Boston butt and not the loin at all.
Temperature, Time, and Doneness
Rib recipes are going to take quite a while longer than most things you cook on your gas grill. Combining large pieces of meat and lots of chewy connective tissues means that long cooking times are inevitable.
To keep from overcooking and over-drying the meat, the heat must be kept low. Nearly all rib recipes aim for 250 degrees Fahrenheit (120°C) or so. This is similar to a smoking recipe, and indeed smoking is a great way to go with ribs.
If you have one, use an internal remote-probe thermometer when cooking ribs so that you can gauge doneness inside the foil.
Interestingly, you should cook ribs to a very high internal temperature well past the standard “done” point. Aim for 225 degrees Fahrenheit (120°C).
This is so much higher than the standard pork temperature of 145°F because of the extra time needed to break down the collagen.
When placing your thermometer probe, use extra care to get it in the fattest part of the meat but as far from the bone as possible. The bone will get warm much faster than the rest of the meat will.
Another great way to gauge the doneness of ribs is to bend or twist one of the bones. If it easily peels away from the meat, you know you’re there, and the collagen has melted. You’re at the “falls off the bone” point — right where you want to be.
How to Cook Ribs on a Gas Grill in Foil
Cooking ribs is a multi-step process, no matter which process you use. Here’s a look at the steps we’ll take to make our foil-wrapped ribs. But remember, the basic steps are the same no matter how you’re cooking the ribs.
Step 1: Prepare the Ribs
Your ribs will benefit from a few moments of preparation before you begin.
The most important step is to be sure to remove the membrane. Unlike the other connective tissues in the ribs, the membrane that covers the underside will not break down during cooking. Further, it keeps your rub from getting to the meat.
The peritoneum, which is the proper name for the membrane in question, is thicker near the backbone. That means it’s essential to remove it with the baby back ribs.
The easiest way to get rid of the peritoneum is to use a dull table knife to lift it away from a bone. You can then progressively peel it off of the rack of ribs. Once you’ve got it started, it usually comes off fairly easily.
Take the opportunity to trim any excess fat off the rack of ribs, but remember to leave some to cook down. Then rinse and pat dry the ribs.
Step 2: Apply Dry Rub
A rub is a mixture of salt and sugar that does 2 things for your ribs:
- It seasons the meat.
- The sugar caramelizes with the natural juices during cooking and makes a good sauce that’s sure to be one of the most authentic barbecue experiences you’ve had.
Every chef has their own variations on what to put in their rub. Truthfully, the precise ingredients don’t matter too much. Use what you’ve got and be creative. The only constants should be the sugar, usually brown, and the salt, usually kosher.
If you want a little kick, add a bit of cayenne. If you want some complexity, add some rubbed sage. The sky’s the limit!
You should leave the rub on for a minimum of one hour in the refrigerator. The best results, though, come from leaving the rub on overnight before the cooking process.
Step 3: Create Some Smoke
If your grill has a smoker box, now is the time to load it up. If you don’t have one, remember that it’s easy to add a smoker tube. You can even make a smoke bomb by putting some soaked wood chips into a foil pouch and sitting it on the direct heat.
Hickory, oak, and mesquite are traditional choices for smoking pork ribs. But you can also use chips made from fruitwoods (e.g. apple, cherry) for a milder and sweeter taste.
Step 4: Start Grilling the Ribs
Load up the smoker of your choice, place it in direct heat above the flame, and start preheating the grill.
Remember, low and slow is the name of the game, so aim for 225 to 250 degrees Fahrenheit (110-120°C). You’ll likely only need one burner.
Set the ribs on the indirect heat side of the grill for about 30 minutes. Flip them around and cook for another 30 minutes.
The purpose is to begin caramelizing the rub, start rendering the fat, break down the connective tissues, and allow the meat to get a good dose of that smokey flavor. However, don’t go too long since there’s plenty of time left in the cooking process.
Step 5: Wrap the Ribs in Foil
Once the ribs have begun the cooking process and absorbed some smoke, it’s important to move them into the foil to keep them from getting overcooked and dry. It also offers the opportunity to soak up some extra moisture, as well as to render a homemade sauce if you’re game.
As you load the ribs into the foil, be sure to insert your remote probe thermometer into the thickest part of the meat without touching any bone.
Inside the foil, the liquid you add is up to you. If your goal is to add moisture, you could use water, broth, or something sweet like apple juice. But if you’re making your sauce from scratch, check out the recipe below for some ideas.
Step 6: Make and Add Barbecue Sauce
Adding any sauce at all is optional. The rub and meat will produce their own amazing glaze no matter what you do. You can use your favorite brand of store-bought sauce. Or you can capture all of the goodness in the ribs and make your own in no time.
The trick is to get the sauce thick and apply it to the ribs with a bit of heat for maximum effect. After removing them from the foil, apply a liberal amount of sauce and grill them for about five minutes on each side.
You can repeat the process as many times as you like while basting more sauce on the ribs. If you want that layered and complex coating your favorite barbecue joint serves up, you should do it for a total of at least 20 minutes.
Step 7: Let Them Rest and Serve
Once your ribs have reached the desired final temperature, remove them from the heat and let them rest for another 10 to 15 minutes.
Now it’s time to divide the ribs into servings and enjoy!
Recipe for Foil-Wrapped Baby Back Ribs on a Gas Grill
Below is our recommended recipe for foil-wrapped baby back ribs:
Delicious Baby Back Ribs
Equipment
- Gas Grill
- Aluminum Foil
- Smoker Box, Smoker Tube, or Aluminum Foil
- Wood Chips for Smoking
Ingredients
For the Rub:
- 8 parts brown sugar
- 3 parts kosher salt
- 1 part chili powder
- 1 part garlic powder
- dash cayenne pepper
- dash fresh crushed black pepper
For the Ribs and Sauce
- 2 whole slabs of pork baby back ribs
- 1 cup apple juice or beer
- 1 tbsp wine vinegar
- 2 tbsp Worcestershire sauce
- 1 tbsp brown sugar
- 4 chopped cloves of garlic
Instructions
- Start by mixing the ingredients for the rub together. You can make as much as you like – just keep the proportions the same. Feel free to add other ingredients and make substitutions – half the fun of using rubs is finding your unique take!
- Remove the membrane from the ribs and trim any excess fat or bone. If necessary to fit on your grill for indirect heat cooking, cut racks in half. Liberally apply the rub on both sides, then wrap in plastic wrap and refrigerate. Let the rub sit for a minimum of one hour, preferably overnight.
- Preheat your grill to 250 degrees Fahrenheit (121 °C) and set up your smoker box. Set up the burners to maximize indirect cooking space and maintain low temperatures.
- When your grill is at temperature, start grilling the ribs. Grill for 30 minutes, then flip them.
- While the ribs are grilling, start making the sauce. Bring juice or beer, vinegar, Worcestershire, sugar, and garlic to a simmer in a small pan. Make sure sugar is completely dissolved.
- At the end of the hour, remove the ribs from the grill, insert your instant-read thermometer, and wrap them in heavy-duty foil. Pour the sauce into the pouches, divided evenly. Place the well-sealed pouches back onto the indirect side of the grill and cook until you reach 205-210 degrees Fahrenheit (96-99 °C) internal temperature. It will likely take around 2 hours.
- Carefully remove one set of ribs and check for doneness by twisting a center bone. If the collagen is melted, the bone should twist away from the meat very easily. If it does not, return to heat for a while longer.
- Once completely cooked, remove pouches from the heat. Carefully pour braising liquid from pouches back into the saucepan. Let the ribs rest while you return the sauce to a simmer. Reduce it by half to make a thick syrupy sauce.
- Apply some sauce liberally to the ribs and return to the grill for about 5 minutes per side, just enough to begin to char the sauce a tiny bit. Repeat turning the ribs while basting with sauce to make them real tasty.
- Let the ribs rest for about 10 to 15 minutes. Cut into portions and serve!


2 thoughts on “How to Cook Ribs on Gas Grill + Foil-Wrapped Ribs Recipe”
Thanks for the recipe, sounds like one similar to what I have used before, but I don’t
know what a “well sealed pouch is” , please explain what it is and how it works.
I’m a resent widower with little cooking experience’
Bill
Hi Bill,
Thanks for your comment!
It just means that when you make a pouch from foil, you should put some effort into folding the edges of the foil to make a pouch that is properly sealed. If the foil pouches are not properly sealed the sauce might evaporate completely and also the pouches might break more easily when you remove them from the grill.
I hope your ribs will turn out delicious, enjoy!!
-Joonas